Use TrueNAS Scale
Install the App
安装应用程序
Since OpenList is not officially available in the TrueNAS Apps catalog, you must use the Custom App feature to install it.
Follow these steps to deploy OpenList via the Install iX App wizard:
Application Name
Enter a name for your application (e.g.,openlist). Keep the default version unless you require a specific tag.
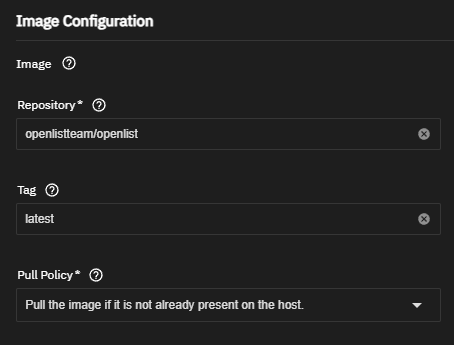
Image Configuration
- Repository:
openlistteam/openlist - Tag:
latest(or specify another version if needed)
Leave all other fields at their defaults.
- Repository:
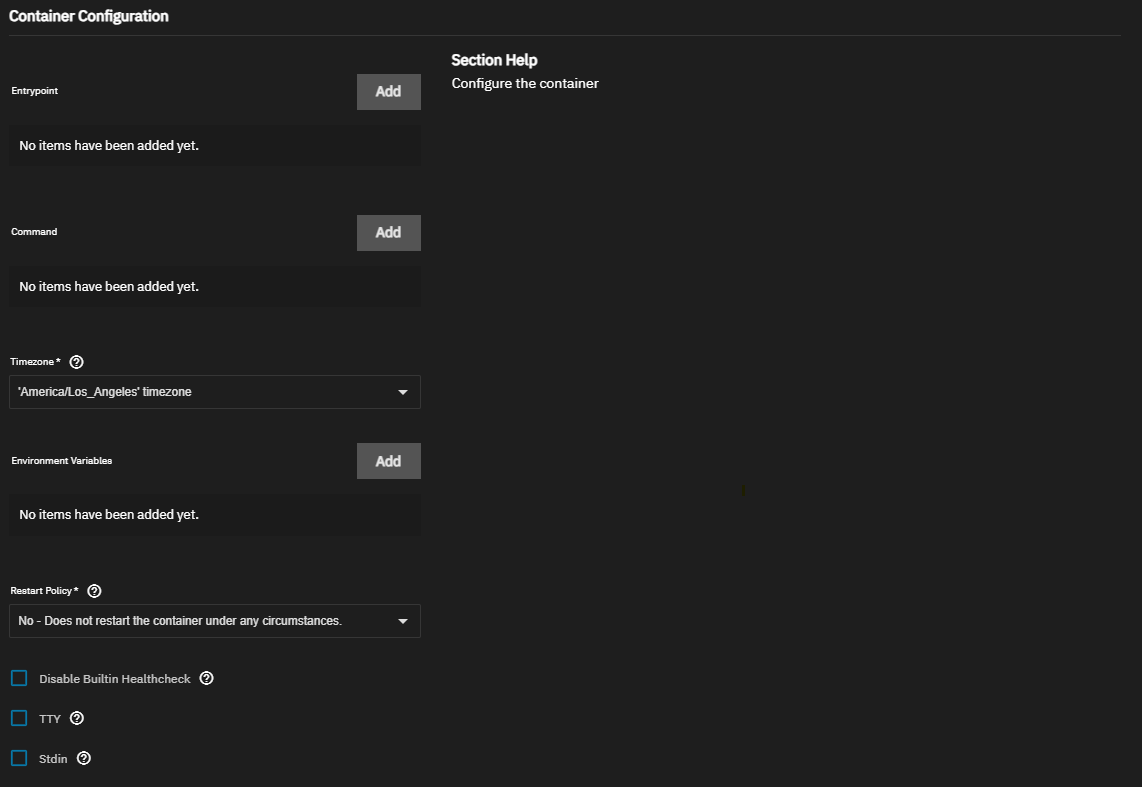
Container Configuration
- Environment Variables:
Add a new variable:- Name:
UMASK - Value:
022
- Name:
- Restart Policy: Select
Unless Stoppedto ensure automatic restart on failure. - Entrypoint: Leave unchanged — it is pre-configured.
Other settings may be adjusted as desired.
- Environment Variables:
Device
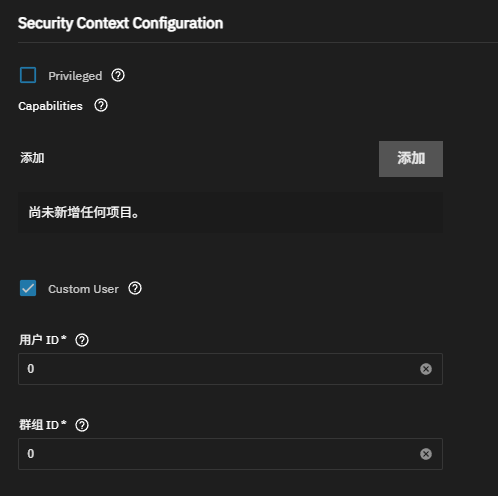
No device passthrough is required for basic operation. Keep defaults.Security Context Configuration
- ✅ Check Custom User
- Set UID and GID to match a non-root user with permissions to access your storage volumes.
Default:568/568(apps/apps) — recommended for security. - ⚠️ Avoid using
root(UID/GID = 0) unless absolutely necessary — it poses a security risk.💡 If you plan to use an ixVolume later, ensure this user has write permissions to the target dataset.
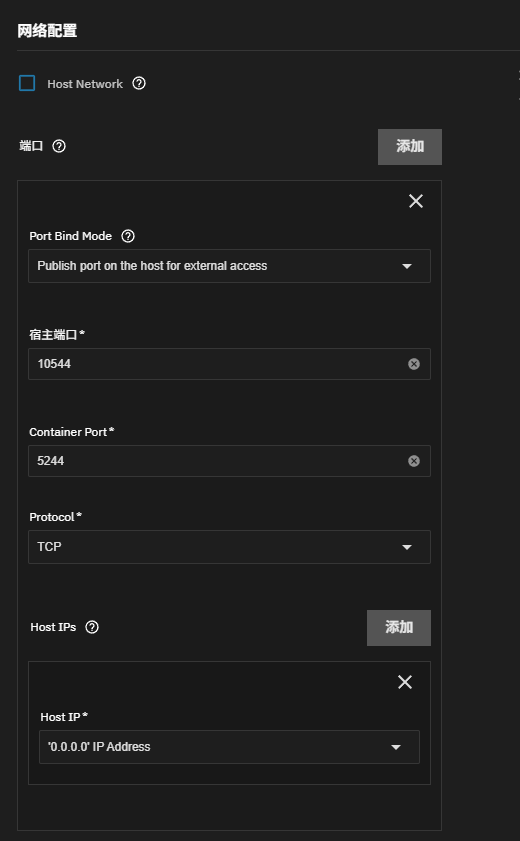
Network Configuration
- Add a port mapping:
- Host Port: Any unused port (e.g.,
10544) - Container Port:
5244 - Host IP:
0.0.0.0(accessible from any network) or restrict to a local IP if preferred.
Add additional mappings only if exposing other services.
- Host Port: Any unused port (e.g.,
- Add a port mapping:
Portal Configuration
- Port: Match the Host Port from Step 6 (e.g.,
10544) - Name: Optional — set to something descriptive like “OpenList Web UI”
Once saved, a Web UI button will appear on the Apps page.
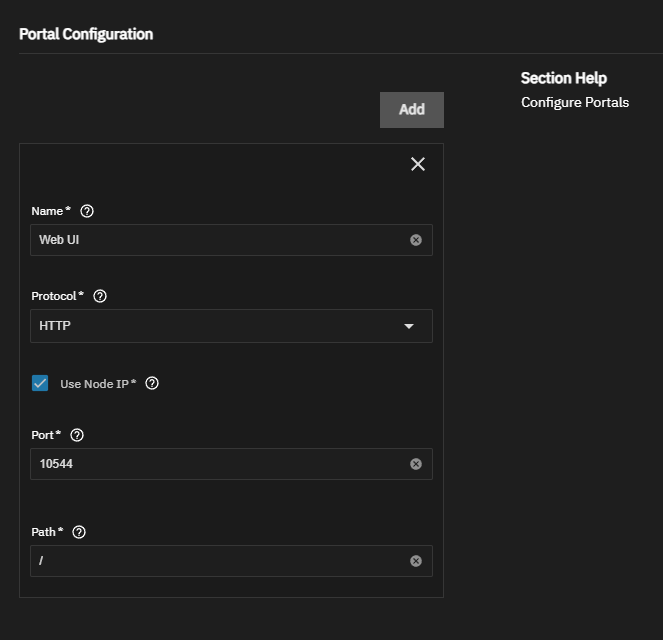
- Port: Match the Host Port from Step 6 (e.g.,
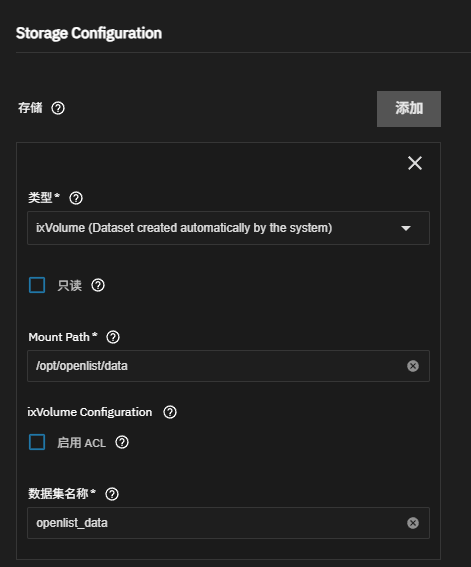
Storage Configuration
- ✅ Mandatory: At least one volume must be configured.
- Click Add → Select storage type (
ixVolumerecommended for persistence). - Mount Path:
/opt/openlist/data - Ensure the container’s user (from Step 5) has write permissions to this location.
- Optionally add more volumes for logs, configs, etc.
📌 Tip: Use ixVolume instead of host paths when possible — it ensures better integration with TrueNAS backup and snapshot features.
Labels Configuration
Skip — not required for basic operation.Resources Configuration (Optional)
Set CPU/memory limits if you wish to constrain resource usage (e.g., 1 core, 512MB RAM).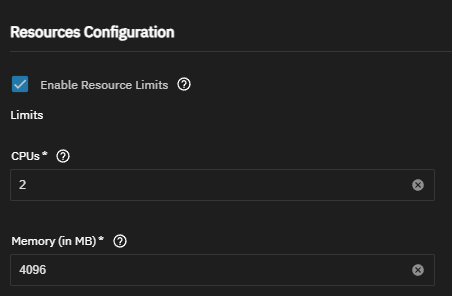
Final Step
Click Install to deploy the OpenList container.
Wait for status to turn green → then click Web UI to access the interface.
由于 OpenList 未在 TrueNAS 应用市场官方提供,您必须使用 自定义应用 功能进行安装。
请按以下步骤通过 安装 iX App 向导部署 OpenList:
应用名称
输入应用名称(例如:openlist)。版本保持默认即可,除非需要特定版本。镜像配置
- 仓库地址:
openlistteam/openlist - 标签:
latest(或指定其他版本号)
其他选项保持默认。
- 仓库地址:
容器配置
- 环境变量:
新增变量:- 名称:
UMASK - 值:
022
- 名称:
- 重启策略:选择
Unless Stopped,确保容器崩溃后自动重启。 - 入口点:无需修改,已预配置。
其他设置可根据需求调整。
- 环境变量:
设备
基础使用无需设备直通,保持默认即可。安全上下文配置
- ✅ 勾选 自定义用户
- 设置 UID 和 GID 为具有存储卷写入权限的非 root 用户。
默认值:568/568(apps/apps)——推荐用于安全性。 - ⚠️ 避免使用
root(UID/GID=0),除非必要,否则存在安全隐患。💡 若后续使用 ixVolume 存储数据,请确保该用户对该数据集拥有写入权限。
网络配置
- 添加端口映射:
- 宿主机端口:任意未被占用端口(如
10544) - 容器端口:
5244 - 绑定IP:默认
0.0.0.0(全网可访问),也可限定为本地IP以增强安全。
如需暴露更多端口,可继续添加。
- 宿主机端口:任意未被占用端口(如
- 添加端口映射:
门户配置
- 端口:填写上一步设置的宿主机端口(如
10544) - 名称:可选,建议填写如 “OpenList Web 界面” 以便识别
配置完成后,应用列表中将显示 Web UI 按钮。
- 端口:填写上一步设置的宿主机端口(如
存储配置
- ✅ 必填项:至少配置一个存储卷用于保存数据。
- 点击 添加 → 选择存储类型(推荐使用 ixVolume 以获得最佳持久化支持)
- 挂载路径:
/opt/openlist/data - 确保第5步中指定的用户对该路径有写入权限。
- 可选:添加额外卷用于日志、配置等。
📌 提示:优先使用 ixVolume 而非主机路径,便于集成 TrueNAS 的快照与备份功能。
标签配置
跳过 —— 基础部署无需配置。资源配置(可选)
可设置 CPU 与内存上限(如:1 核心、512MB 内存),避免资源过度占用。完成安装
点击 安装 启动容器。
等待状态变为绿色后,点击 Web UI 按钮即可访问 OpenList 界面。